 Help Center Doctor
Migrate from the Zendesk Proactive Tickets app in 20 minutes
Six steps to move from the app Zendesk is discontinuing on 21 October 2026 to Proactive Outreach, without losing an audience or a message and without a customer noticing. Times are what it took us on a test account with 330 users; yours will be similar.
Do step 1 while the old app still opens. After 21 October 2026 its screens, saved audiences and drafts are gone; the tickets it created stay. Background and the comparison of alternatives: what to use instead of the Proactive Tickets app.
Step 1 · Copy your audiences and messages out (3 minutes)
Open the old app and, for each campaign you send more than once, write down how you picked the people (a tag such as beta_customers, an organization, a search) and paste the subject and message into a document. You will paste them into Proactive Outreach in step 4. If you used lists of e-mail addresses, keep them as a CSV with an email column; a name column is optional.
Tickets sent by the old app remain in your account. If you want to reach the same people again, note the tag the old app put on its tickets: Proactive Outreach can build an audience from the requesters of tickets with that tag.
Step 2 · Install Proactive Outreach (2 minutes)
Install it from the Zendesk Marketplace (the listing is in Zendesk's review queue; ask to be told the day it is live). It appears in the left navigation bar of Support. There is no account to create and no server: the app runs in the agent's browser with the agent's own Zendesk session. Free covers 200 tickets a month; the paid plans start with a 14-day trial and are billed by Zendesk.
Step 3 · Check the delivery setup (3 minutes)
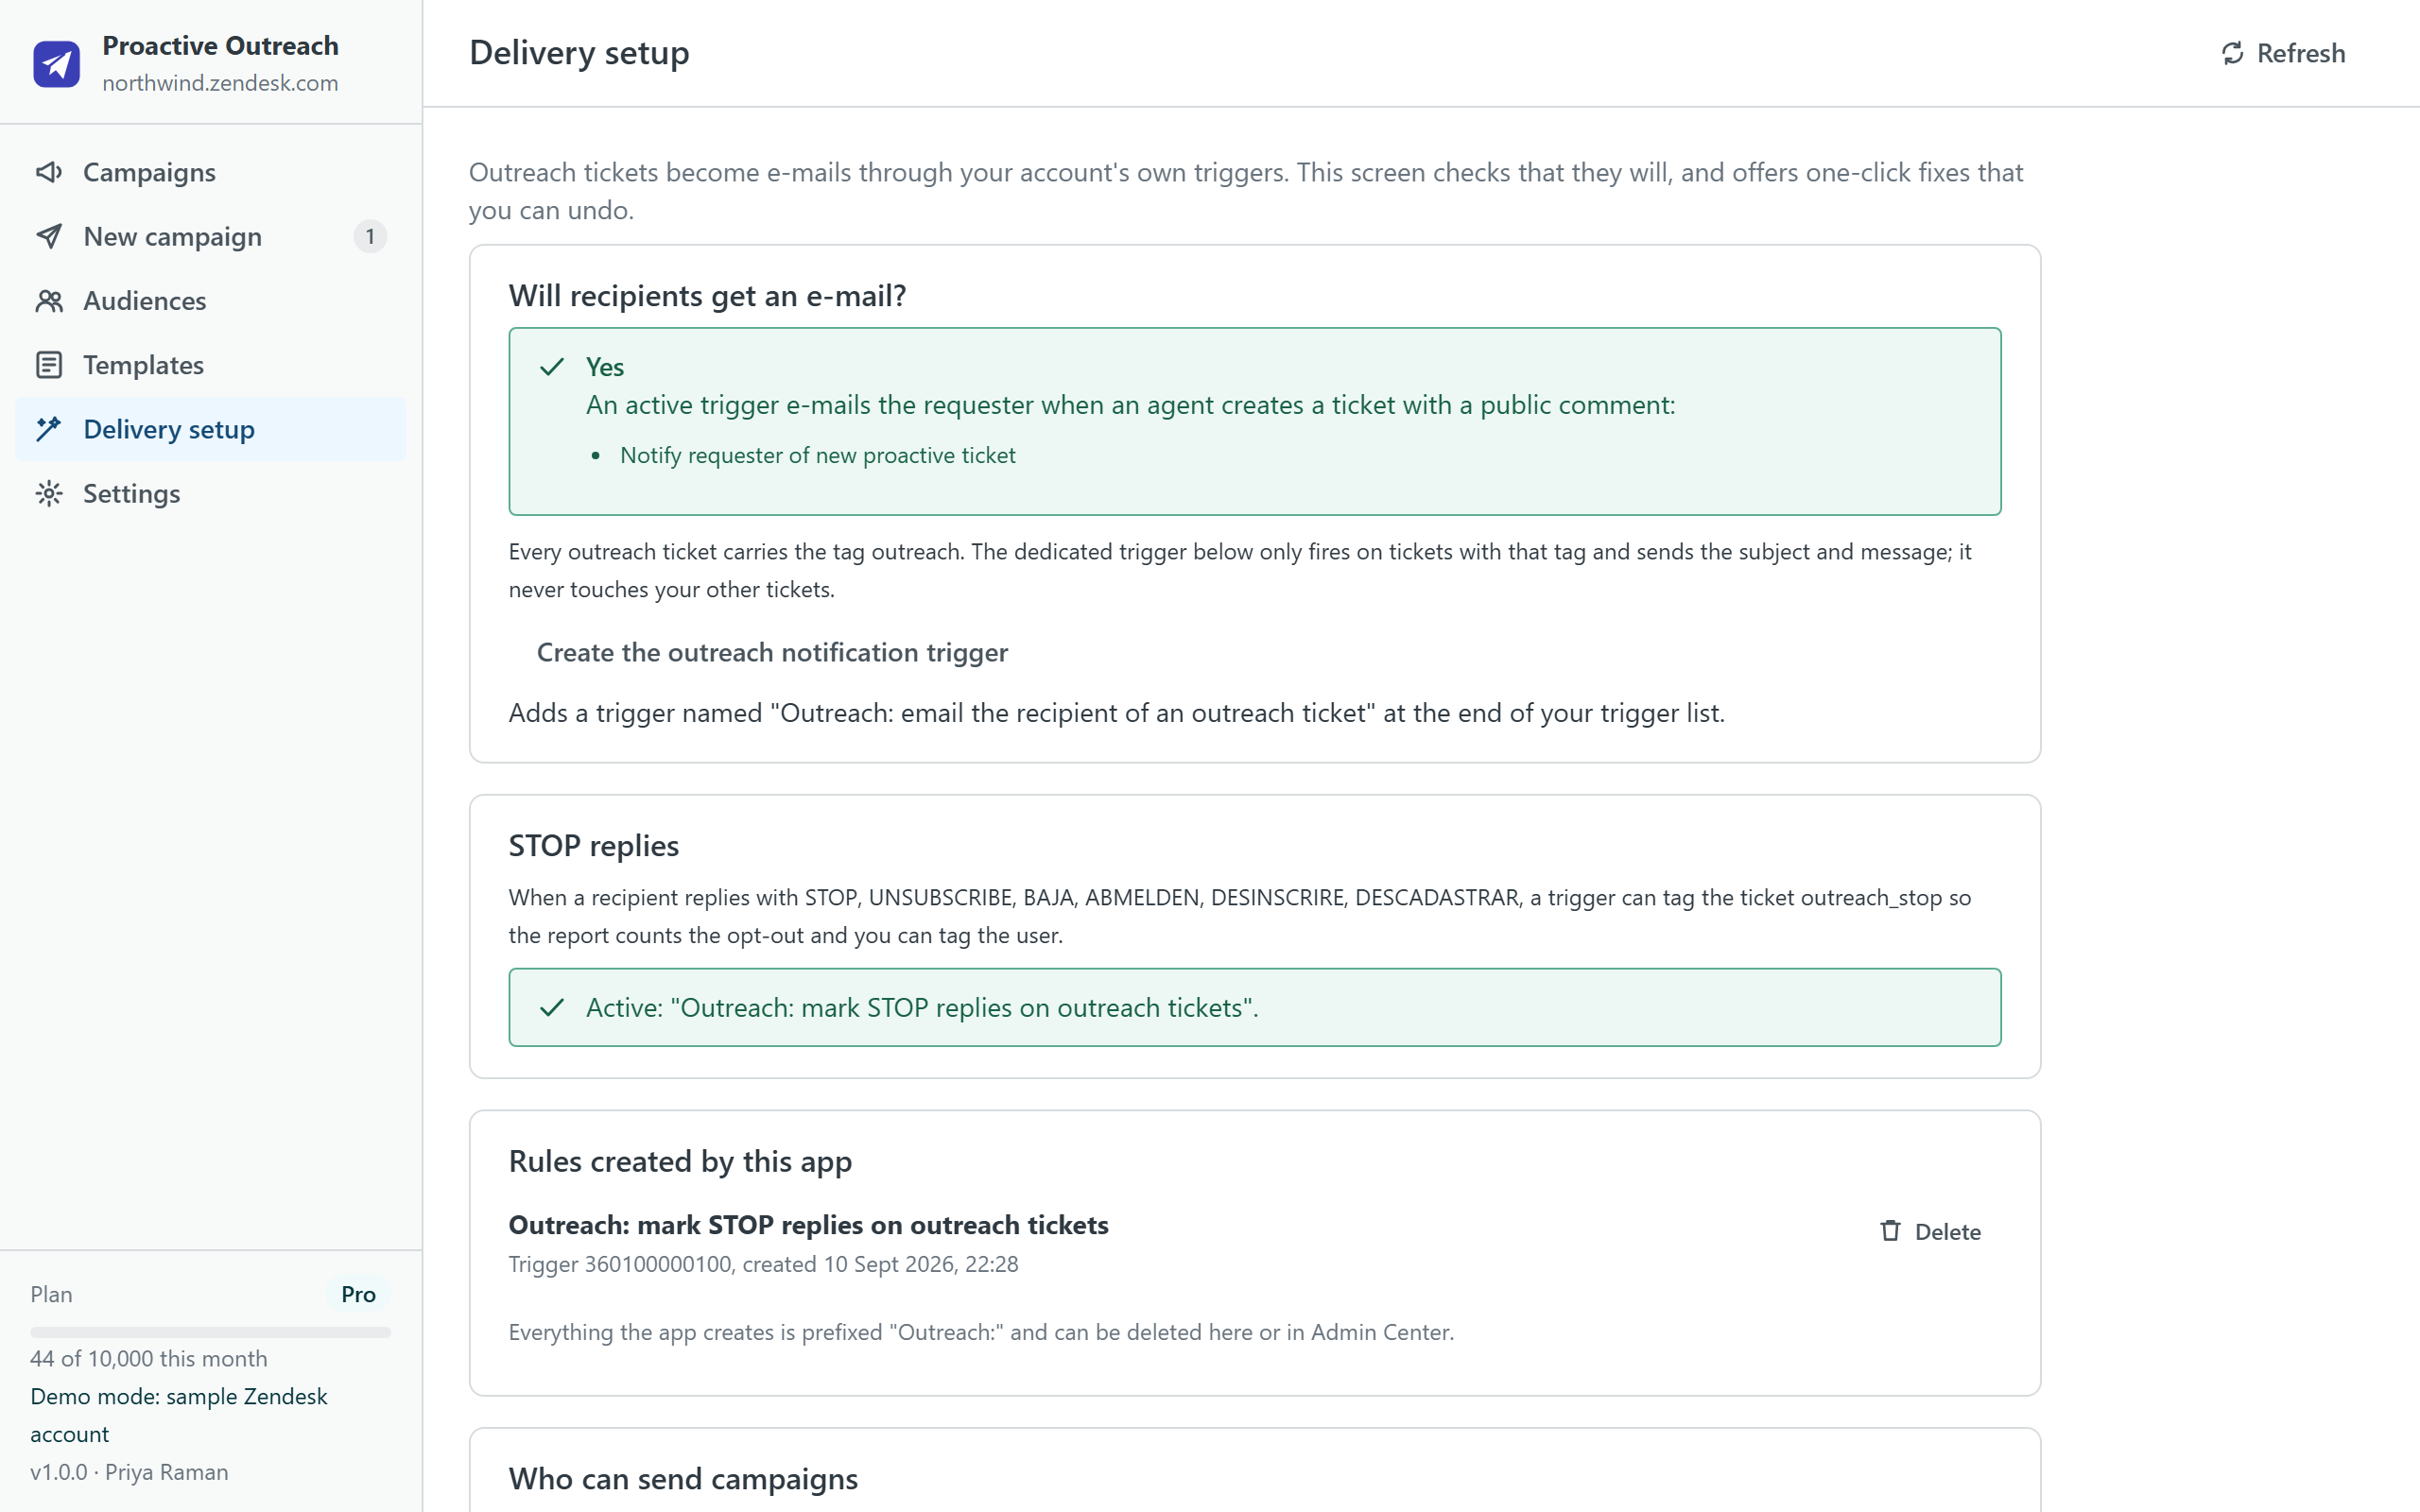
Open Delivery setup. The screen answers three questions and offers a one-click fix for each:
- Will recipients get an e-mail? It looks for an active trigger that e-mails the requester when an agent creates a ticket with a public comment (the standard "Notify requester of new proactive ticket"). If none is active it can create one scoped to the
outreachtag, so it never touches your other tickets. - What happens when someone replies STOP? It can create a trigger that tags the ticket
outreach_stopwhen the requester's reply contains STOP, UNSUBSCRIBE or their equivalents in five languages. The report counts those and lets you tag the users so the next campaign skips them. - Who may send? Restrict sending to a group, choose the opt-out tags (people with
do_not_contactoroutreach_optoutare always excluded) and the maximum tickets per minute.
Step 4 · Build the first campaign and send yourself a test ticket (5 minutes)
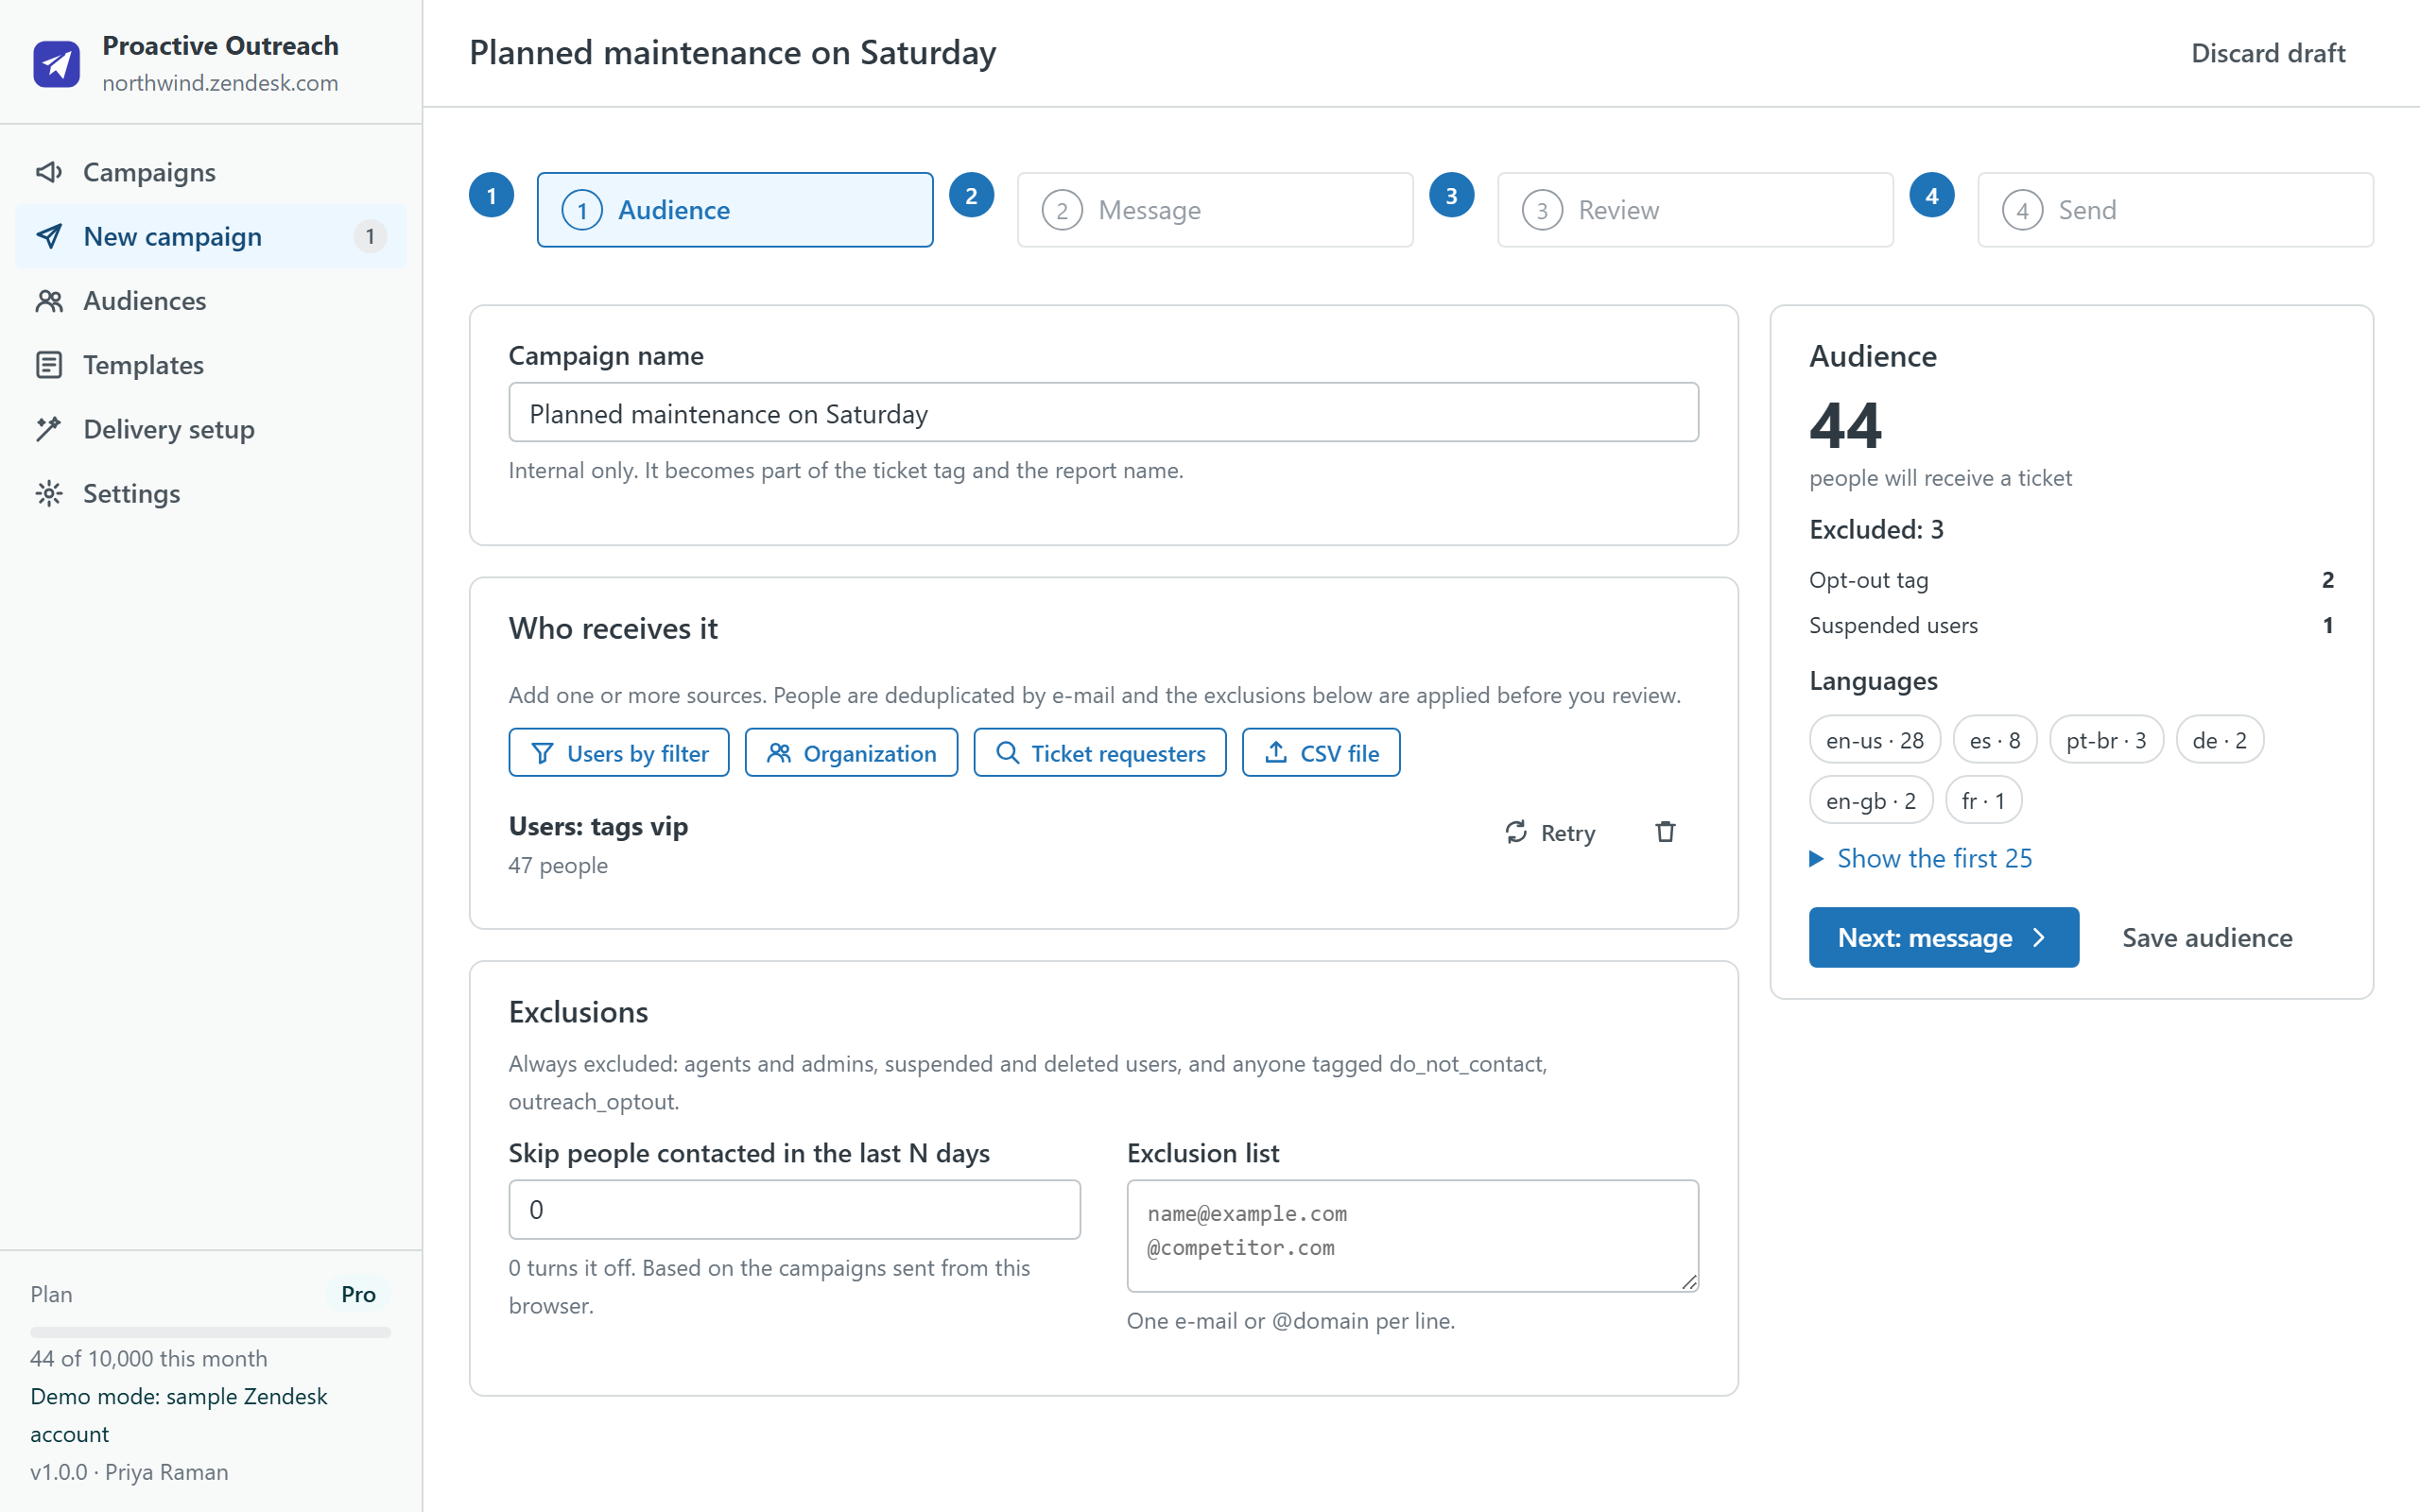
Audience. Add one or more sources: users by filter (tags, organizations, language, creation dates, free text), a whole organization, the requesters of tickets matching a search, or a CSV file. People are deduplicated by e-mail; agents, admins, suspended users and anyone with an opt-out tag are excluded before you see the count. You can also skip anyone contacted in the last N days and paste an exclusion list.
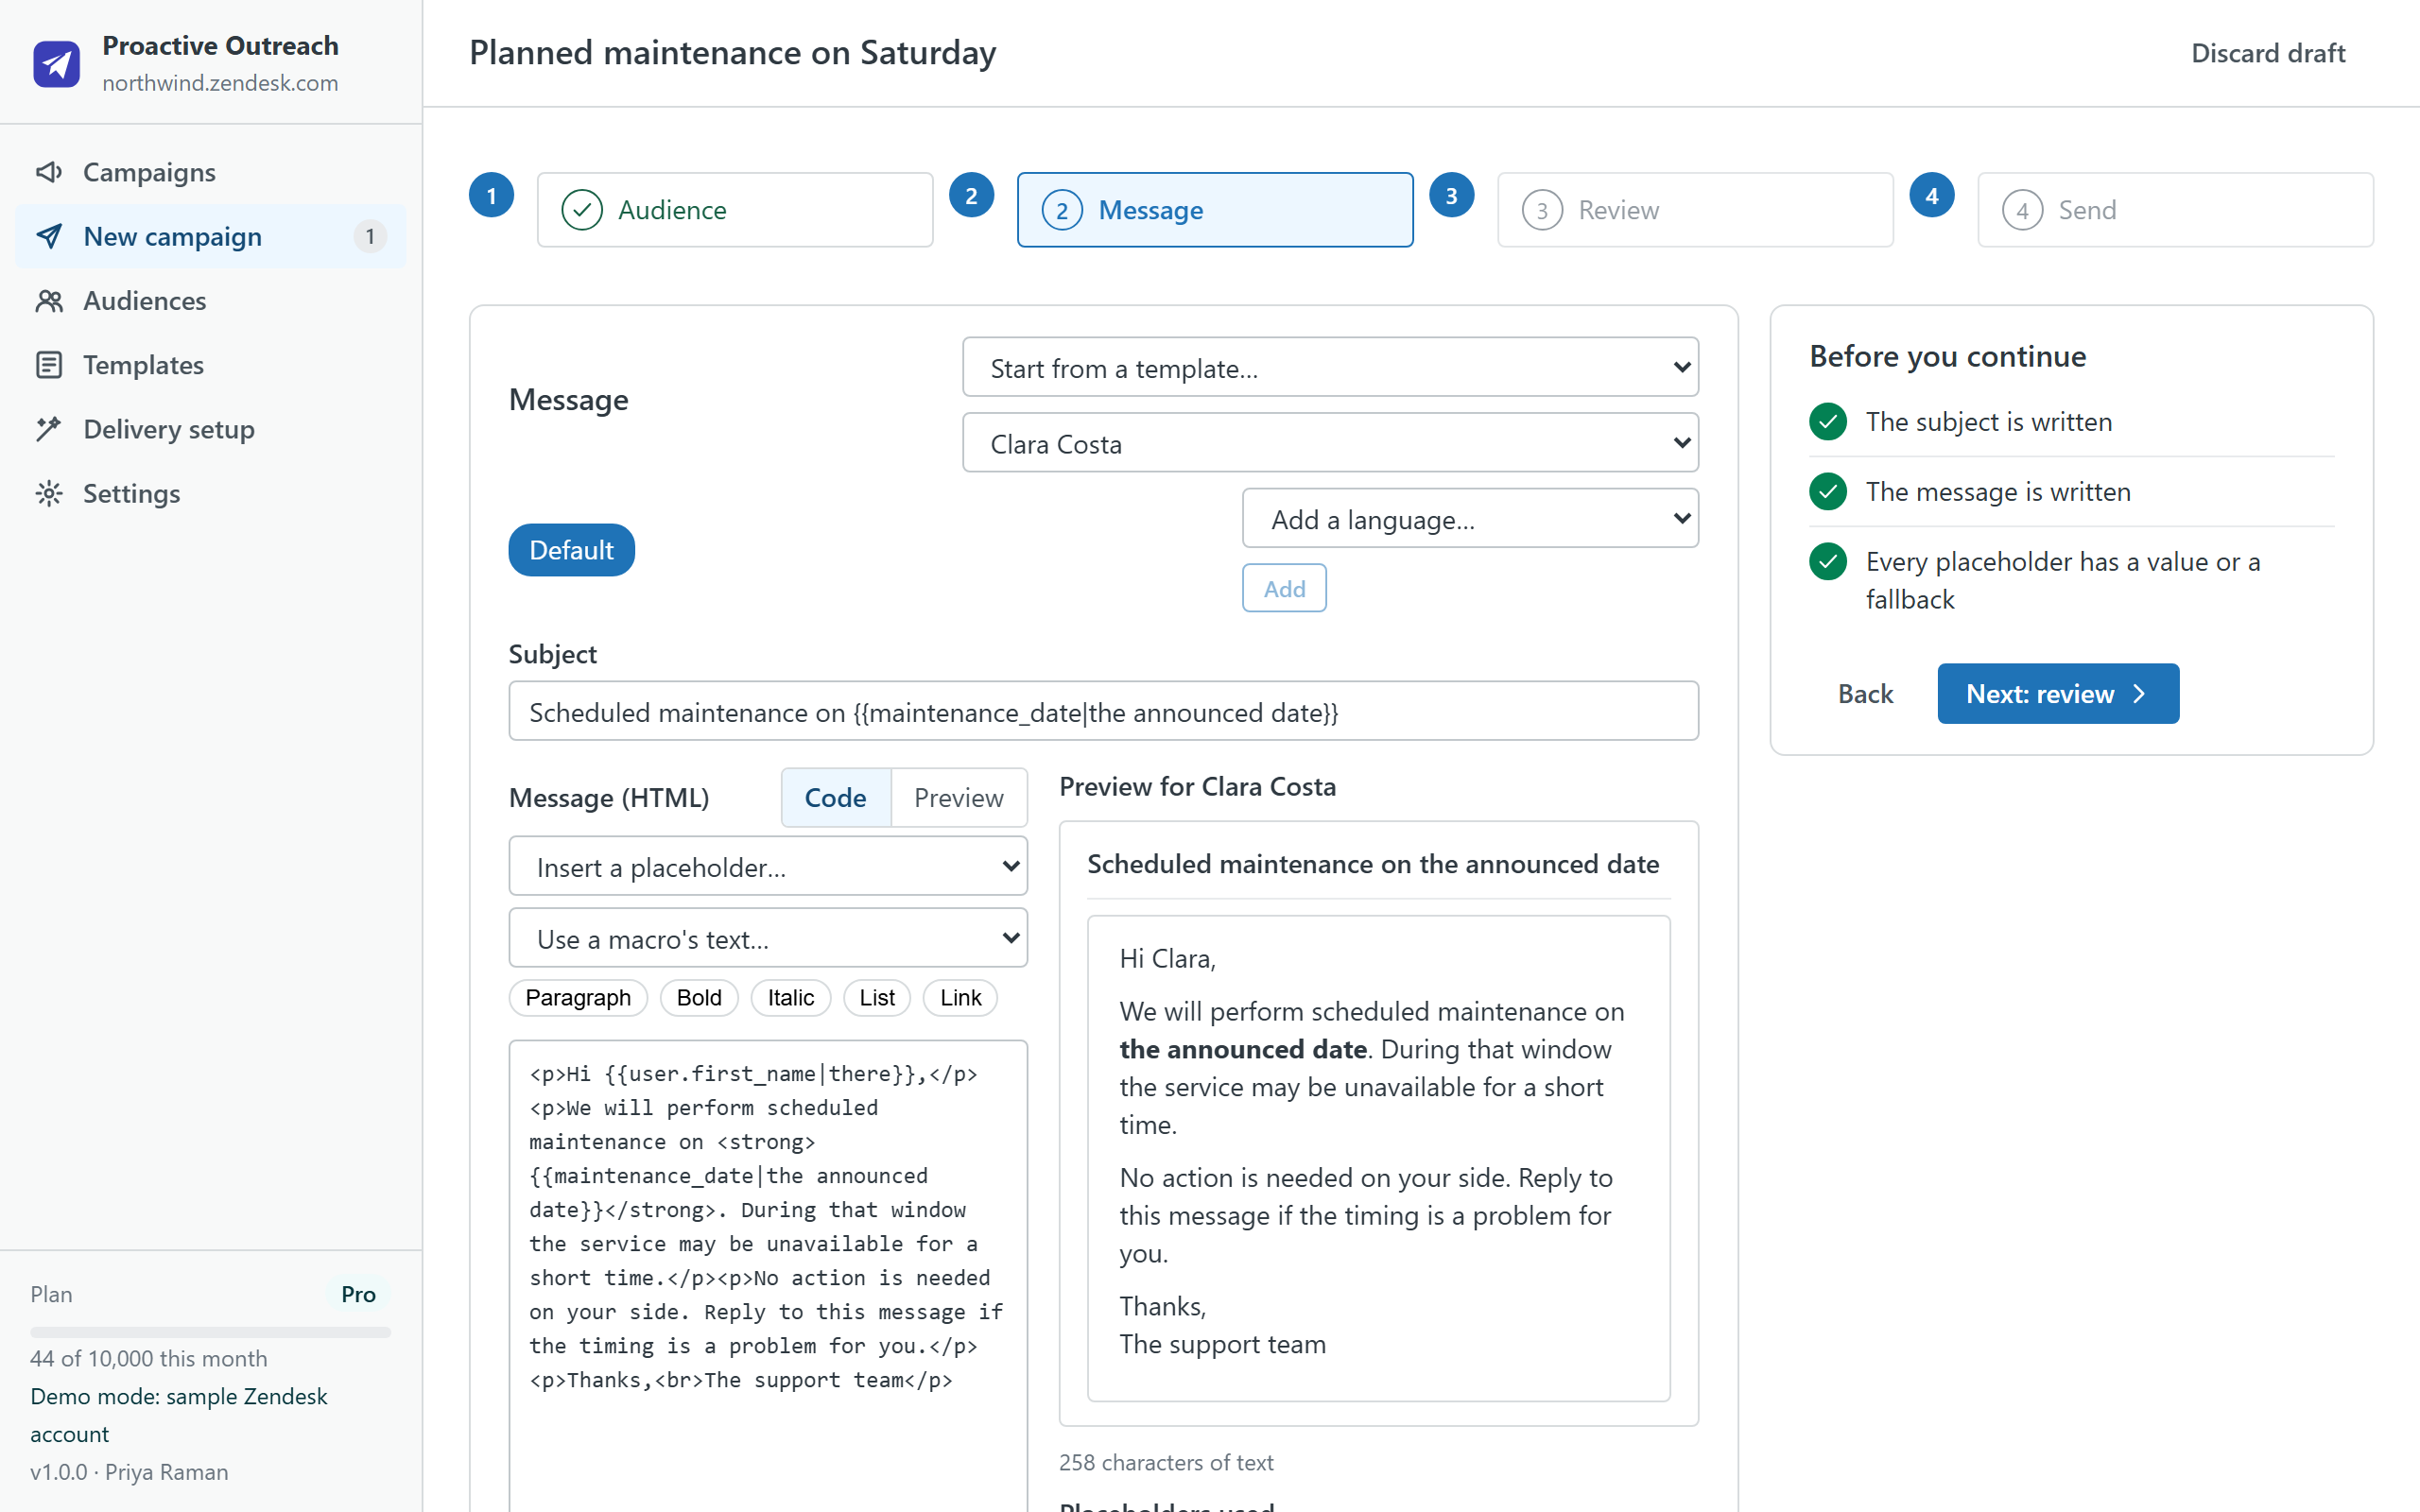
Message. Paste the subject and body from step 1. Placeholders such as {{ user.first_name | there }} take a fallback after the pipe; the preview on the right renders the message for real recipients, and the app refuses to continue while a placeholder has no value and no fallback. A macro can be used as a template; on Pro you can add a variant per language.
Review. The review step lists who receives it, how the ticket will look (status, tags, sender address) and three checks: the plan limit, the notification trigger and a test ticket. Click "Send me a test ticket": a ticket arrives in your own inbox with the first recipient's data, so you can read the e-mail exactly as customers will. Tick the consent box (a service message to people you have a relationship with, not marketing) and the Send button unlocks.
Step 5 · Send small and read the report (2 minutes)
For the first real campaign keep the audience under 100 people. The app creates the tickets in batches through Zendesk's bulk-create API, respects the rate limit you set, and can be paused or resumed; if the tab closes, reopening the campaign resumes it and nobody gets two tickets. Keep the tab open while it sends.
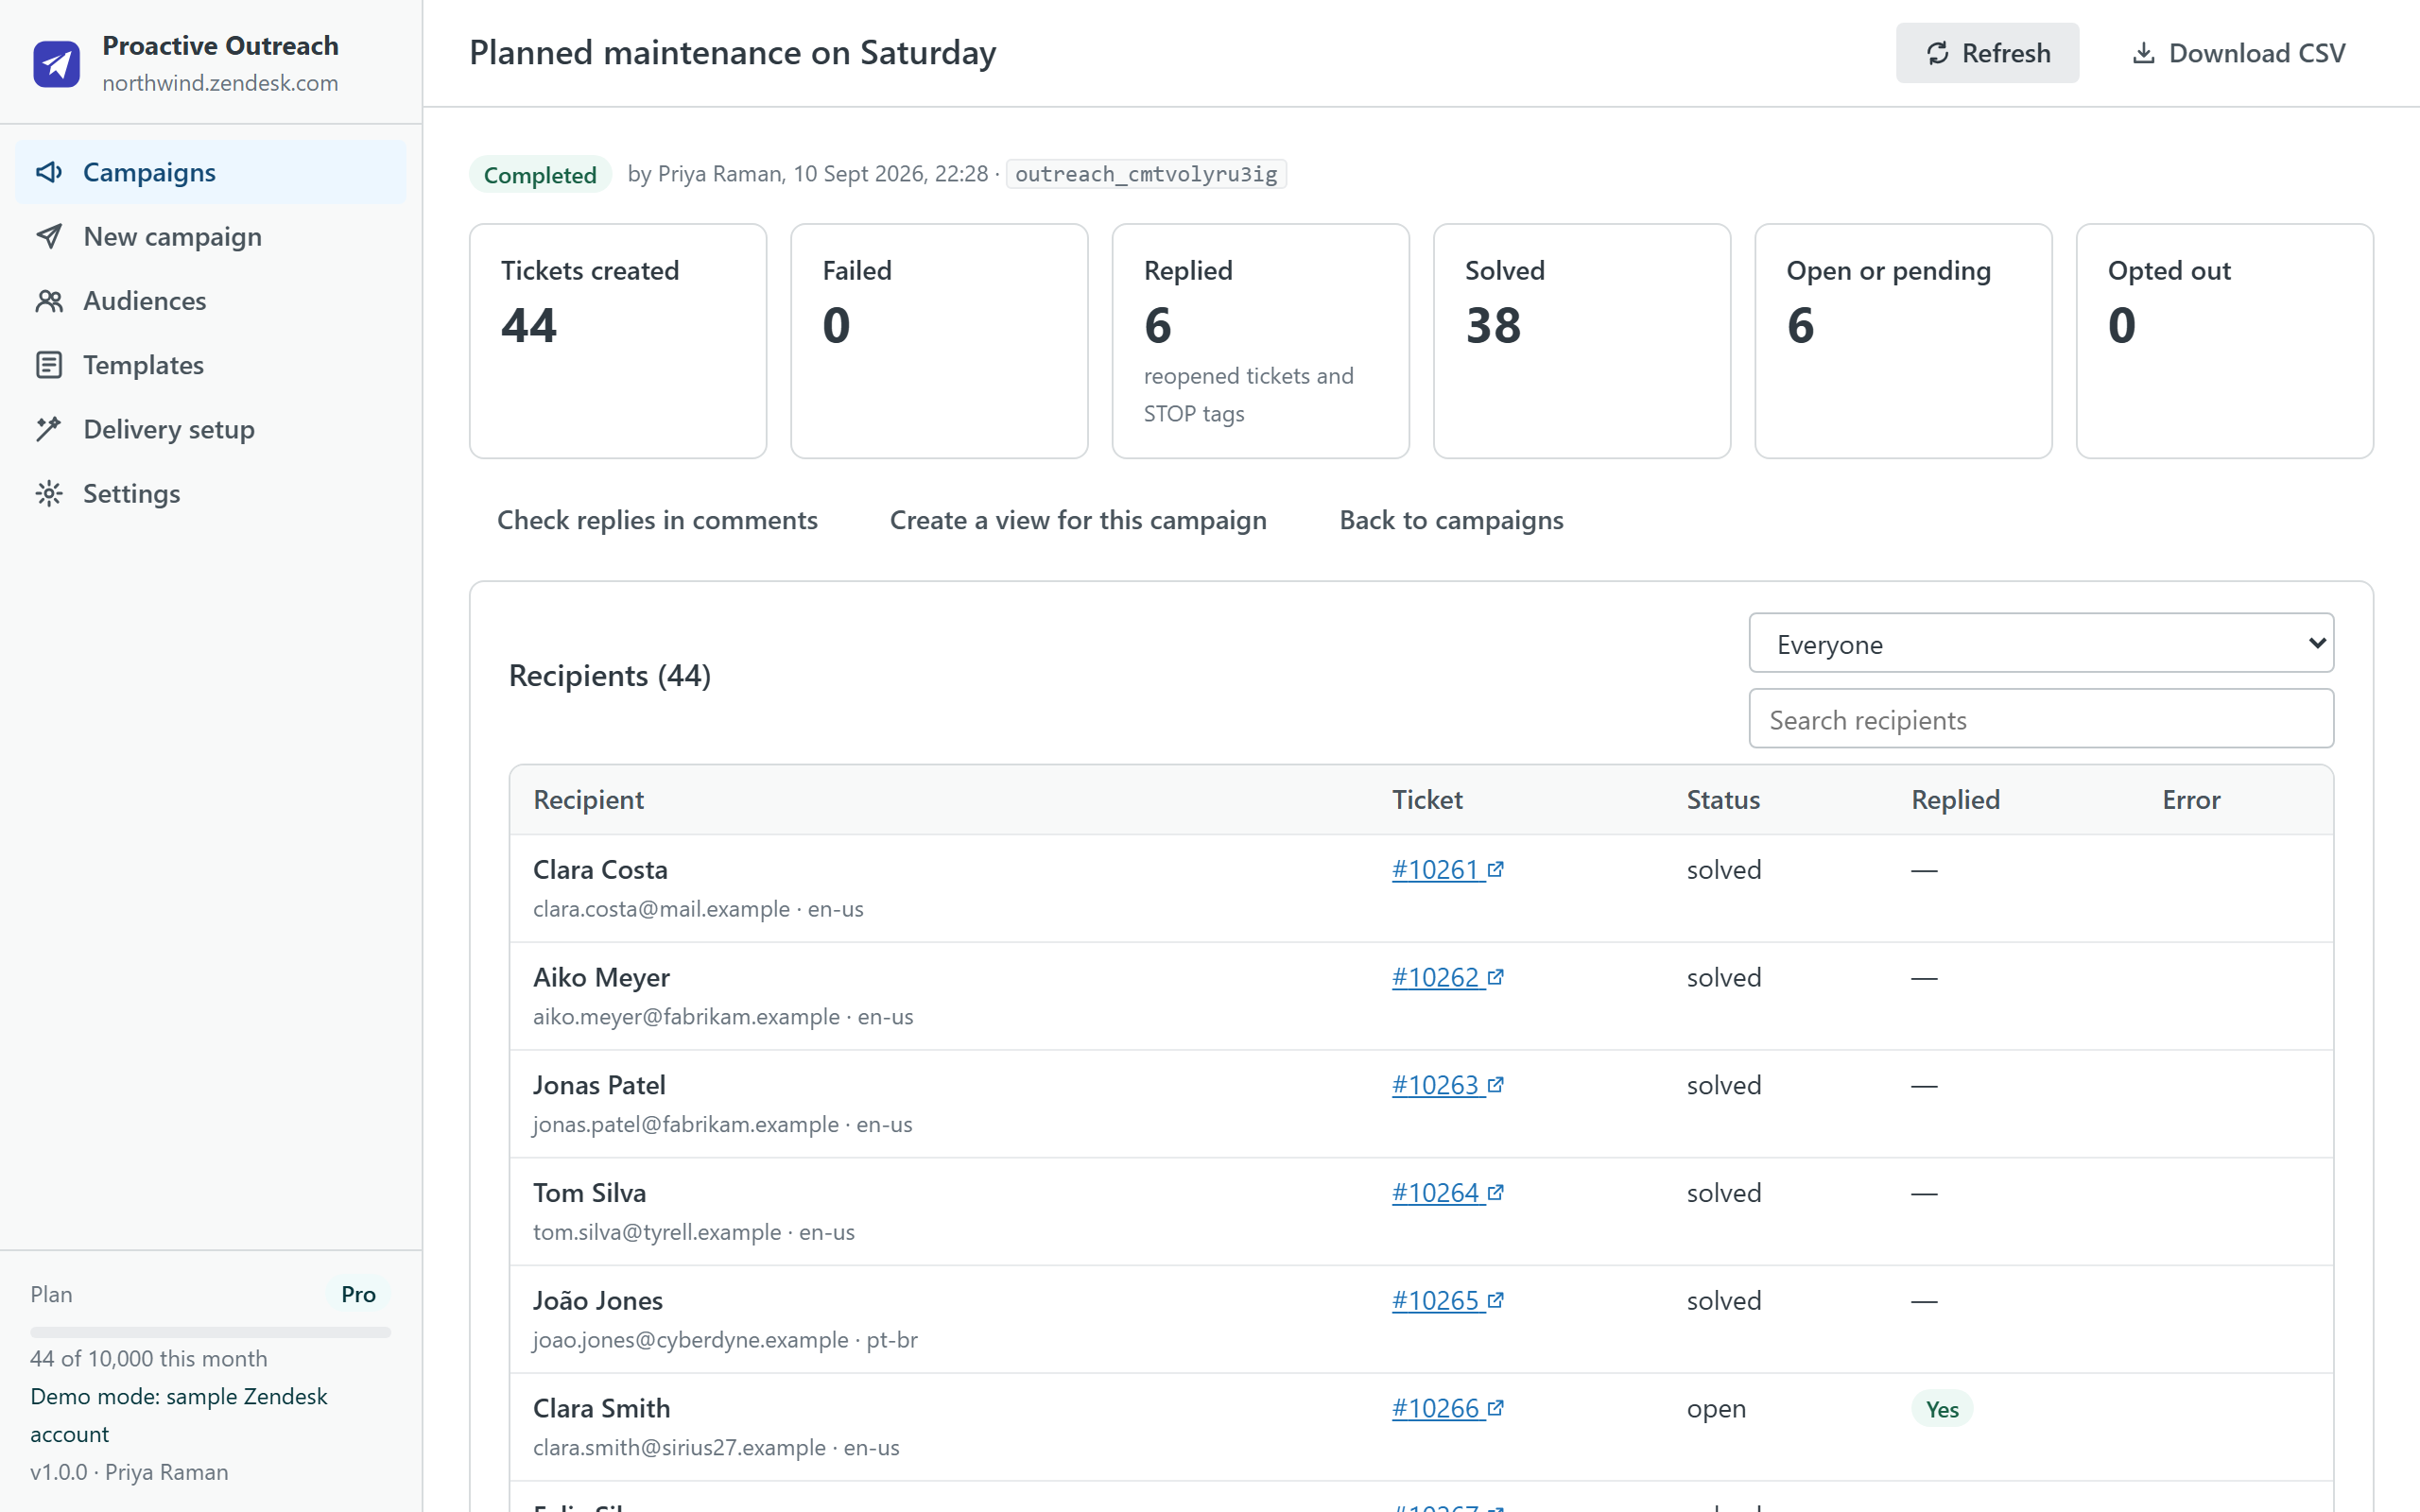
The report shows created, failed, replied, solved, open and opted-out counts, and a table with every recipient, the ticket number and its status. "Check replies in comments" reads the tickets that changed and marks the ones where the customer answered. Failures can be retried; the report downloads as CSV.
Step 6 · Save what you will reuse (5 minutes)
- Save the audience from the audience step: the definition (sources, exclusions) is saved, not the list, so it is fresh next time.
- Save the message as a template with its placeholders and fallbacks.
- Create a view for the campaign from the report (Pro): a Zendesk view that lists its tickets and replies for the whole team.
- Publish the library so colleagues see the same audiences and templates; it is stored in the app's own settings inside your account.
Checklist to print
- Audiences and messages copied out of the old app before 21 October.
- Notification trigger confirmed active (Delivery setup shows a green check).
- STOP-reply trigger created; opt-out tag chosen.
- Sending restricted to the right group.
- Test ticket received and read as a customer would.
- Five-colleague campaign sent; sender address, subject, placeholders and reply routing verified.
- First real campaign under 100 people; report read; opt-outs tagged.
- Audience and template saved; library published.
If something is unclear
Write to support@helpcenterdoctor.app; we answer within one business day, and during the migration window we answer the same day.
See the app before you install it
Screens, plans and the full feature list of Proactive Outreach, plus the comparison with the other replacements.